
Cloudfence provides a free repository of plugins for OPNsense. To install it, just follow the steps below.
Installation of the Repository
To access the plugins developed by Cloudfence, you will need to enable the repository in your OPNsense. This is done very simply as described in the steps below:
Enabling SSH Access
Before starting the installation, it is necessary to enable SSH access or access OPNsense via the command line.
To enable SSH access in your OPNsense:
 Fig. 1 - System: Settings: Administration
Enabling the Cloudfence Repository
To enable the Cloudfence repository, simply run the command below (with root privileges):
After installation, the repository should be activated through the Cloudfence:Repository menu:

 Fig. 2 - Enabling the Cloudfence repository
- Check the Enabled option.
- If you have an active support plan, fill in the Subscription Key field with the key you received by email with your subscription confirmation. This should give you access to the commercial repository which has exclusive plugins. More information here. Otherwise, just jump to the next step:
- Click on the Save button
Installing plugins from the Cloudfence repository:
- Access the Dashboard by clicking on Lobby: Dashboard
- Click "Click to check for updates"

Fig. 3 - Lobby: Dashboard
After the automatic update of repository packages, check if the repository is enabled:

Fig. 4 - 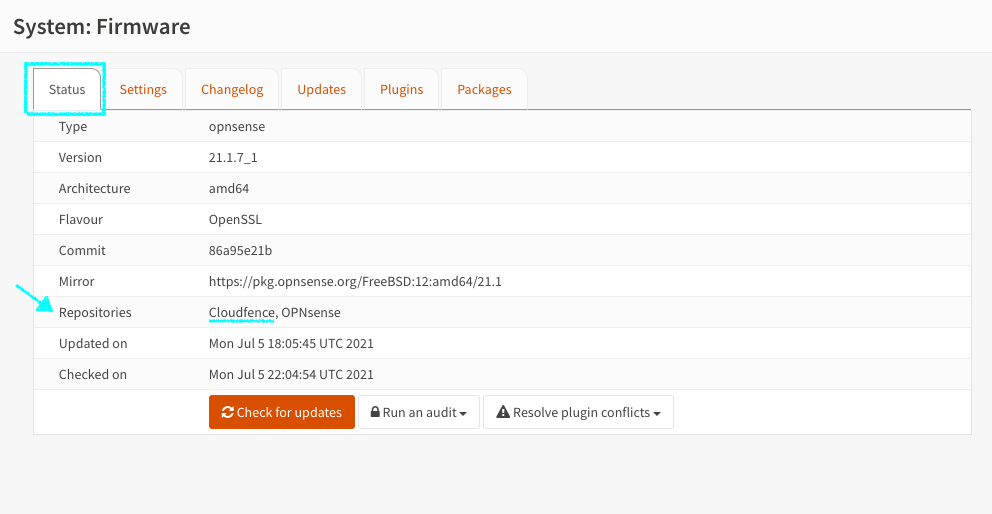 System: Firmware - Status tab
System: Firmware - Status tabWith the Cloudfence repository listed, Cloudfence plugins can already be installed through the System: Firmware: Plugins menu:

Fig. 5 - System: Firmware - Plugins tab
System: Firmware - Plugins tabType for example "webvbpn" to search and install the Web VPN plugin.
Support Plans - Activate Cloudfence Services
If you have contracted a support plan, you will receive a Subscription Key that will be required to connect OPNsense with our cloud services:

Fig. 6 - Activate the contracted support plan key
- Fill in the field with your Subscription Key
- Click the Save button.
- The Enable Cloudfence Services button will appear, click on it to start the activation process.
- Preencha o campo com sua Subscription Key
- Clique no botão Save
- O botão Enable Cloudfence Services surgirá, clique nele para iniciar o processo de ativação.
If the button does not appear, check if your key is correct and if your plan is active. You can purchase a support plan by clicking here!
After clicking the Enable Cloudfence Services button, the dialogue box below will appear and to proceed with the installation of the packages, just click on the Install and enable Cloudfence Services button.

Fig. 4 - Install necessary packages to activate Cloudfence Services
During the installation process, a message like the one below will be displayed. After the installation process is completed, this message will disappear.

Fig. 8 - Installation of necessary packages to activate Cloudfence Services
After installation and with the service active, the button will change to uninstall mode:

Fig. 6 - Disable Cloudfence Services
Uninstalling / Deactivating Cloudfence Services
To remove the installed packages and deactivate Cloudfence services, simply click on the Disable Cloudfence Services button.
The only packages that will be kept are the Cloudfence Repository itself and Zenarmor (which is installed by default) when Cloudfence services are activated. They can be removed manually from the page: System / Firmware / Plugins.
With an active support plan, you can count on our help at any time through the help link: Submit a new support ticket